Introduction
Recently I had the pleasure of using SSIS (SQL Server Integration Services) to transfer a database from a remote MySQL database to an Azure SQL database in the cloud. This post describes the steps in transferring the data using SSIS through Visual Studio 2015 and the integrated BI Data Tools.
What is SSIS?
Microsoft describes SSIS as:
Microsoft Integration Services is a platform for building enterprise-level data integration and data transformations solutions. You use Integration Services to solve complex business problems by copying or downloading files, sending e-mail messages in response to events, updating data warehouses, cleaning and mining data, and managing SQL Server objects and data. The packages can work alone or in concert with other packages to address complex business needs. Integration Services can extract and transform data from a wide variety of sources such as XML data files, flat files, and relational data sources, and then load the data into one or more destinations.
In layman’s terms SSIS is used to integrate and transform data between different technologies; for example moving data from a flat text file to a relational database; or transforming data from an Excel file to XML files written to a file share. SSIS is created using a flow chart style interface in Visual Studio which we will see further into the post.
Installing the BI Data Tools
This post assumes that you have already installed Visual Studio 2015. To use SSIS through Visual Studio you need to download and install the BI Data Tools from the following link https://msdn.microsoft.com/en-us/library/mt204009.aspx.
Do you have access to the remote MySQL database?
This was my first road block.. the hosting package we were required to work with did not allow direct connections to the source MySQL database other than through phpMyAdmin hosted on the same server as the hosting package. If you have direct access to the MySQL database then you can skip to the next section.
The way I got around this first road block was to take a full database dump (including data) through the phpMyAdmin web front end, and then load the full dump into a local MySQL database using the following steps.
1. Download and run the mysql-installer-web-community installer which can be found here: http://dev.mysql.com/downloads/installer/. Install the following features:
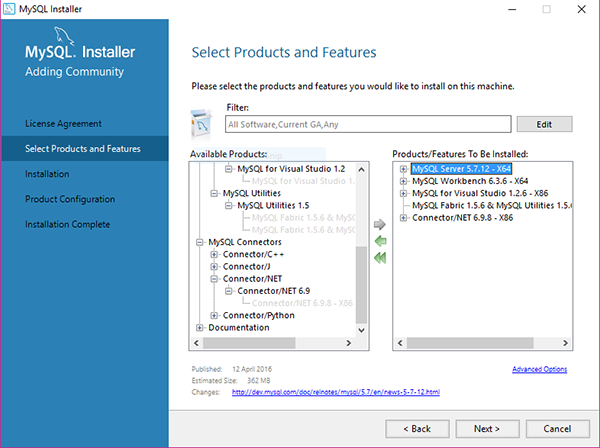
This will install MySQL, the required services, and MysqlWorkbench locally, which will allow us to create and manipulate a new database based on the remote database dump using a front end GUI.
2. Install the MySQL ODBC driver from http://dev.mysql.com/downloads/connector/odbc/. This will allow us to connect to the local MySQL database through SSIS / Visual Studio.
3. Once installed open MysqlWorkbench and connect to the local instance by clicking on Database > Connect to Database.
4. Click on Data Import/Restore > and fill in the following details (pointing to your MySQL dump file) > Start Import:

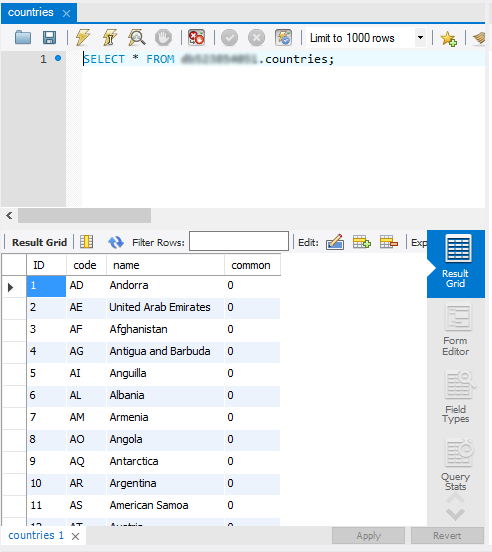
5. After the database dump is successfully imported check the database and data exists by querying the records:
OK, let’s get started with SSIS
Now that we either have access to the remote MySQL database, or our local MySQL database copy, let’s go through the following steps to get started with the connection managers in SSIS.
Create a connection to the MySQL database in SSIS
1. In Visual Studio 2015 create a new SSIS project. Right click on Connection Managers and add a new ODBC connection.
2. Choose ‘Use Connection String‘ and click on Build:
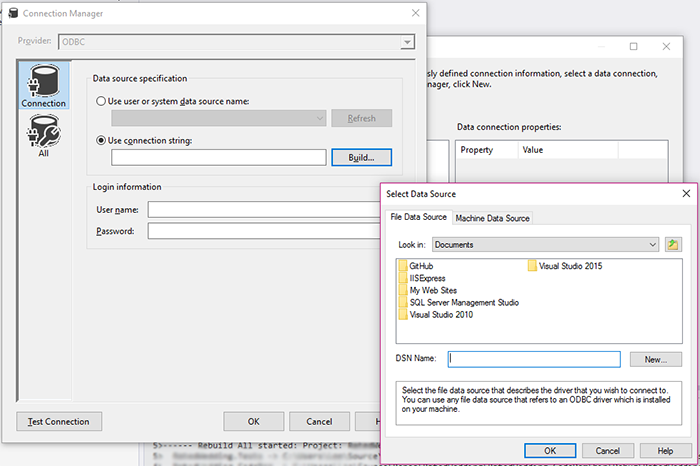
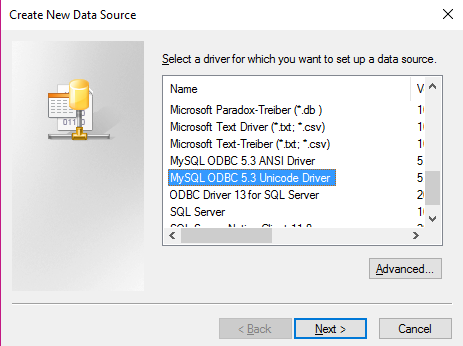
3. Create a new DSN and choose the MySQL ODBC Unicode driver, choose a path to store the DSN, and click Finish.
4. Next, fill in the connection details of the MySQL database you are working with (either local or remote)

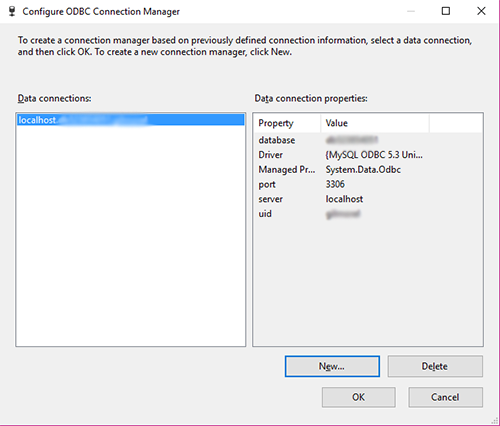
5. Now select the new DSN and click back through the connection manager which will generate the following connection string:
Driver={MySQL ODBC 5.3 Unicode Driver};server=localhost;uid=username;database=yourdatabase;port=3306
Then click OK to see the following screen which shows you have successfully created the connection to the MySQL database.
Create a connection to the Azure SQL database in SSIS
Now that we have a connection in SSIS to the source MySQL database, let’s go ahead and create a connection to the destination Azure SQL database.
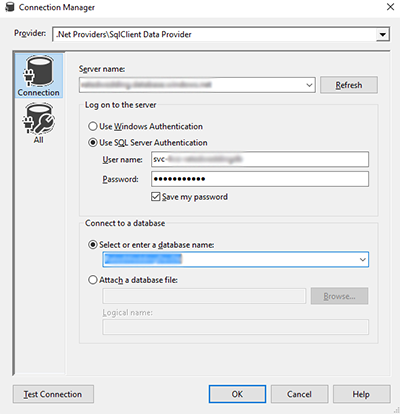
1. Right click on Connection Managers > Choose ADO.NET connection type > Click New.
2. Add the connection details for your Azure SQL database and then click OK twice:
3. In the ‘Connection Managers’ pane click on the Azure connection > Go to ‘Properties’ and set the ‘RetainSameConnection‘ property to True.
This is one of the most important steps to ensure one connection is used for all steps; and not a new connection for each. Later in the post we will be using SQL Server’s IDENITY INSERT commands which need to be ran on the same connection as the insert statements.
That’s the connections created, now for the Data Flow’s
OK, now that we have access to the source and destination databases we need to start the data flow tasks to map the data across.
1. The first step is to drag a new Sequence Container onto the Control Flow pane of the Package DTSX.
2. We now need to ensure that we set the Identity Insert to On for our destination database to ensure the correct Identity IDs (primary keys) are used rather than SQL Server generating new IDs on the table for each migrated row, which will not match that of our source IDs.
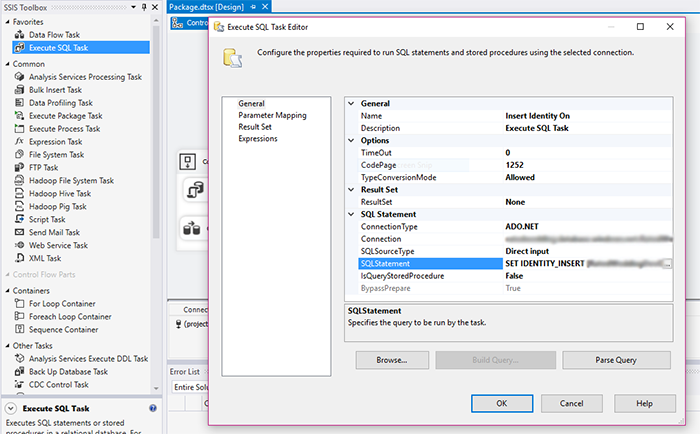
Drag on an Execute SQL Task into the container > Name it ‘Insert Identity On‘ > Double click on it to get to the properties > Set the Connection Type to ADO.NET > Set the Connection property to your Azure Connection > and set the SQLStatement property to
SET IDENTITY_INSERT [YourDatabase].[dbo].[YourTable] ON
3. Now follow the same steps as above to drag another Execute SQL Task into the container with the name ‘Truncate YourTable‘ but with the following SQLStatement value to delete all rows from your table before importing. This will allow you to run the package more than once.
DELETE FROM [dbo].[YourTable];
4. Now drag on a Data Flow Task and name it YourTableDataFlow (in our example we have called it UsersDataFlow) We will come back to this later.
5. Once the data is copied across in the Data Flow Task we need to set the Identity Insert to off again. This will mean any further rows added to the table will automatically get a generated primary key value again.
Drag on another Execute SQL Task following the same steps as step 2; however this time name it ‘Insert Identity Off’ and set the SQLStatement property to
SET IDENTITY_INSERT [YourDatabase].[dbo].[YourTable] OFF
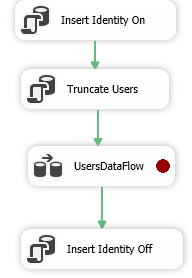
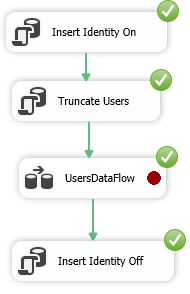
6. Drag the connectors between the objects and you should see the result looking like this:
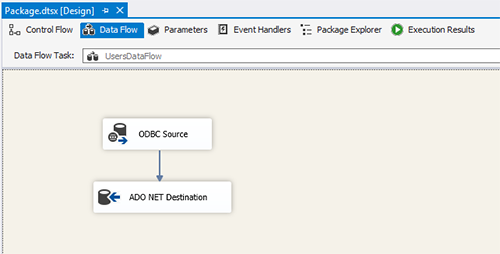
7. Now that we have the basic set-up done, double click on the Data Flow object (in our case we have called it UsersDataFlow). Drag on an ODBC Source (this is our MySQL database source).
8. Now drag on an ADO NET Destination (this is our destination Azure SQL database) and add the connector between the two. You should see the following:
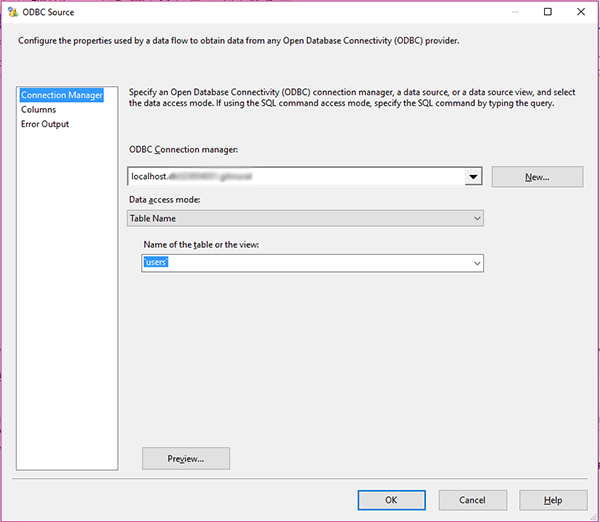
9. Double click on the ODBC Source to open the editor and add your MySQL connection details pointing to your corresponding Connection Manager > And point to the table within your MySQL database (in our case the Users table):
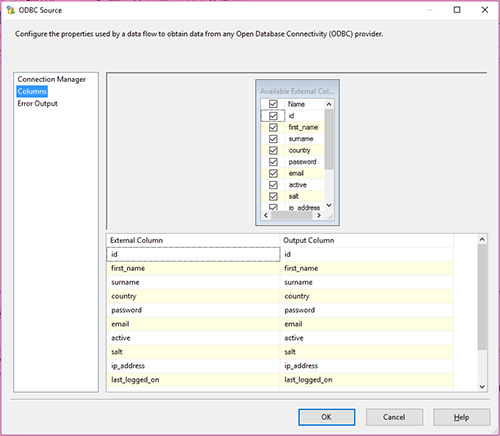
10. Click on the Columns menu item on the left > and change the Output Column values if needed to match that of your destination database (this step is optional). Click OK.
11.Now double click on the ADO NET Destination object to open up the editor and follow the same steps as step 9 to point to your Azure SQL database and table. This is where you wants the data to be moved across to as the final destination.
Ensure that the ‘Use Bulk Insert Where Possible’ check box is unchecked. Leaving this checked will cause issues with the Identity Insert commands we used earlier.
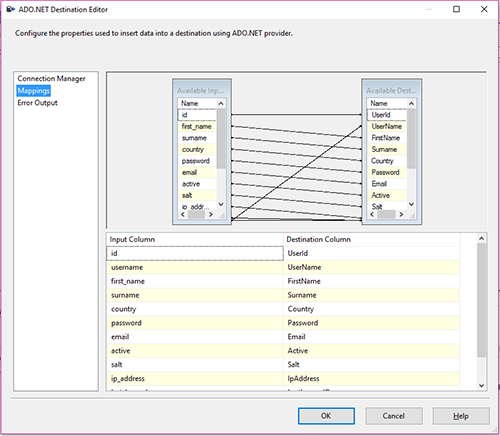
12. Click on the Mappings menu item on the left and map the columns between your source table and your destination table (if you set the output columns to match in step 10 then they will automatically be mapped for you) Once mapped you should see a screen similar to below:
OK, now lets run the project
Now that we have everything set-up correctly in the SSIS project we can run it by clicking on the ‘Start’ button in the Visual Studio menu. If everything has run successfully you should see green circles against each step; and checking your Azure SQL destination table should show you the same rows which have been migrated across from MySQL.
Conclusion
This post should give you enough information to get your basic data migration from MySQL to Azure SQL performed using SSIS through Visual Studio 2015; although it just touches the surface of what SSIS can do.
